

")
")
")
")


You’re ready to bring your brand to life…but then you open the Showit editor and suddenly, excitement turns into overwhelm.
Where do you even begin? How do you make it truly feel like your brand. Not just a generic template?
Here’s the good news: all Hazel + Willow templates come with step-by-step video tutorials to guide you through the customization process. And if you’re using a different template or need extra support, this guide will show you how to turn any Showit template into a strategic, polished site that actually works for your business.
In this guide, I’ll walk you through Showit template customization so it reflects your brand, connects with your audience, and helps you book more clients.
TL;DR
- Prepare your assets before editing: Have your colors, fonts, copy, and photos ready to go.
- Clarify your brand foundations: Know your style, personality, and target audience.
- Plan your site structure and CTAs: Decide on pages, navigation, and what action you want visitors to take.
- Write strategic copy first: Your words should connect and convert before you worry about design.
- Customize visuals page-by-page: Work in order, check mobile, and make intentional changes.
- Optimize for user experience: Test links, forms, speed, and readability.
- Launch with confidence: Announce it, update your links, and celebrate your work.
Step 0 – Prepare Your Assets Before Editing
One of the biggest time-savers in Showit template customization is doing your prep work. When you gather all your visual and written elements ahead of time, you avoid the “open Canva, open Showit, open Google Docs, get distracted” cycle.
Start by organizing these core brand elements:
- Your brand colors. In Showit, set your color palette from dark to light to maintain contrast and accessibility. If you don’t have a palette yet, choose colors that align with your vibe and meet contrast guidelines.
- Your fonts. Pair one serif and one sans serif for variety and legibility. Assign them in Showit’s Design Settings so they apply sitewide.
- Your copy. Draft your headlines, body text, and CTAs before jumping into design. AI can help you brainstorm, but your voice matters most. Always personalize.
- Your photos. Upload your images to the Showit Media Library so they’re ready to drag and drop. Use a mix of brand photos and high-quality stock if needed.
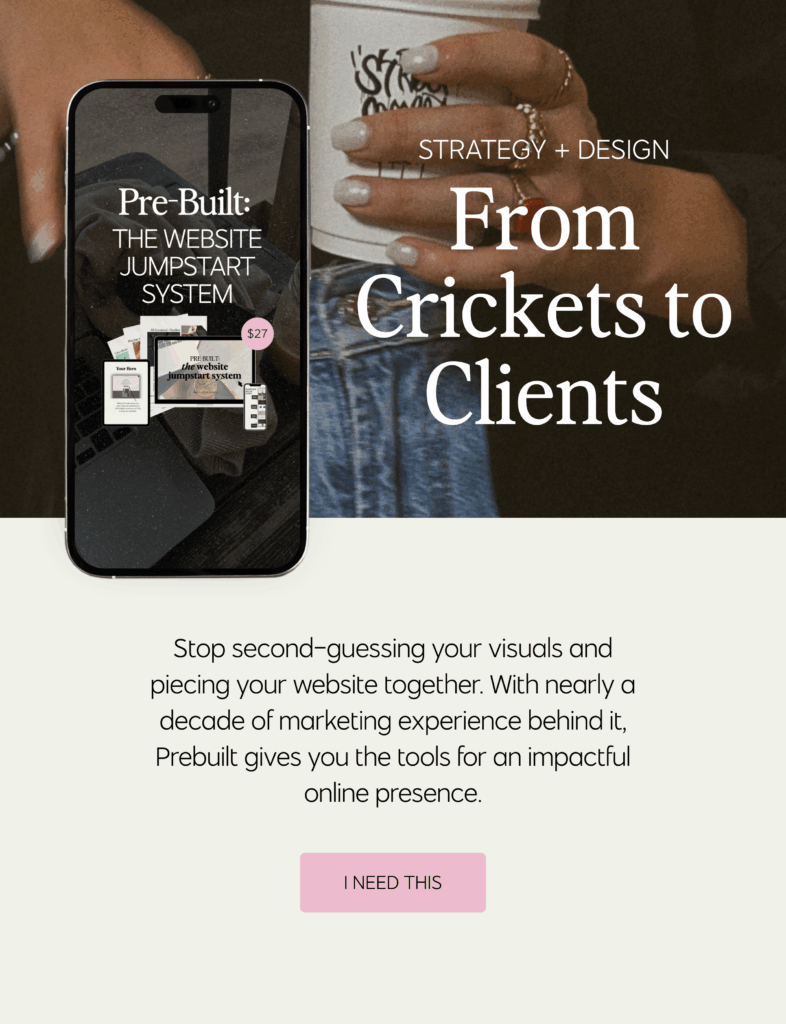
Feeling overwhelmed by all the prep? That’s exactly why I created Prebuilt: The Website Jumpstart System, to help you organize your copy, visuals, and strategy before you ever log into Showit. If you want to skip the guesswork and build with confidence, Prebuilt walks you through everything step-by-step.

Step 1 – Clarify Your Brand Foundations
Before you touch a single design element, you need to know exactly what your brand stands for and who you’re speaking to. Otherwise, your site will feel scattered no matter how pretty it looks.
Start by getting clear on:
- Who is my ideal client right now?
- What transformation am I helping them achieve?
- How do I want them to feel when they land on my site?
This clarity influences every decision from your homepage headline to the color of your buttons. Without it, you risk designing a site that looks good but doesn’t connect or convert.
Inside Showit, these foundations come to life in your Design Settings where you’ll assign your brand colors, typography, and default button styles. These aren’t just aesthetic choices; they’re signals that shape how visitors perceive you. If you serve high-level professionals, for example, bold modern fonts might communicate confidence better than soft, handwritten ones.
If you’re still refining your brand message or ideal client, this is where Prebuilt: the Website Jumpstart System can help. It walks you through the foundational strategy you need to confidently design a site that speaks directly to your audience.
Step 2 – Define Your Core CTA and Align Your Site Structure
One of the fastest ways to lose a potential client? Making them guess what to do next.
Most high-converting Showit templates (including all of mine) come with a strategic page structure already built in. But to make it work for your business, you need to be crystal clear on this first:
What’s the main action you want visitors to take?
- Book a discovery call?
- Apply for your coaching program?
- Buy a digital product?
- Join your email list?
Once that’s clear, your job is to align every page of your site to support that one core CTA.
Here’s how:
- Homepage: Introduce what you do and lead with a strong CTA above the fold.
- About page: Share your story in a way that builds trust and points back to your offer.
- Services/Offers page: Highlight benefits, not just features, and prompt action with well-placed buttons.
- Contact page: Keep it simple, with a form and clear next steps.
- Blog (optional): Use posts to nurture and educate. Each one should include a CTA aligned with your main offer.
If you’re using one of my templates, you’ll see these CTAs built into key spots already but you’ll want to personalize the copy and make sure it all supports your current business goals.

Step 3 – Write Strategic Copy Before You Design
Design without messaging? It’s just decoration.
Before you start adding in your photos or moving canvases around, your words need to be in place. Copy is what converts. It’s how you connect with your audience, guide their decisions, and ultimately turn a visitor into a client.
Start with the most important piece:
- Homepage headline: This should clearly communicate what you do and who you help. For example:
“I help overwhelmed moms simplify their wellness routines and feel more energized every day.”
Then, layer in:
- Subheadlines that reinforce your value
- Benefit-driven bullet points that highlight transformation
- Strong CTAs that move visitors to action
If you’re using one of my templates, these spots are already built into the layout. All you have to do is drop in your messaging.
Pro tip: Draft your copy in Google Docs before entering it in Showit. This makes it easier to write without design pressure and it gives you flexibility to adjust layouts later without starting from scratch.
In Showit, small changes in text length can shift spacing or alignment (especially on mobile) so working from finalized copy will save you major time and frustration.
Step 4 – Customize Visuals Page-by-Page
Once your copy is in place, it’s time to make the design your own.
Resist the urge to jump around randomly. Start with your homepage and move through each page in order. This helps you maintain a consistent visual flow and makes the entire process more efficient.
On each page:
- Swap in your brand colors and fonts using the Showit Design Settings so they apply sitewide.
- Replace placeholder images with your brand photos or high-quality stock that reflects your aesthetic.
- Adjust spacing to fit your copy; especially headlines or longer text.
- Customize or remove sections like testimonials, opt-ins, or blog previews based on your business needs.
If you’re using one of my templates, you already have a visually strategic foundation so this step is about aligning it with your voice, your story, and your brand personality.
Showit also gives you freedom to experiment with textures and canvas backgrounds. Sparingly add a custom, elevated feel without overcomplicating the design.

Step 5 – Optimize for User Experience
A beautiful site is only effective if it’s easy to use.
Before you hit publish, spend time testing your site like a real visitor would. Small usability issues like broken links or clunky mobile formatting can break trust and cost you conversions.
Here’s what to check:
- Click every link and button. Make sure nothing goes to a dead end.
- Test your forms. Confirm that submissions go through (and that notifications are set up correctly).
- Review mobile and desktop separately. Showit lets you design these independently so take advantage of that.
- Check your load speed. Compress large images and avoid unnecessary animations or videos.
This step isn’t about perfection. When your site feels easy and intuitive to use, your audience is far more likely to take action.
Step 6 – Launch with Confidence
You’ve customized your site, refined your visuals, and tested every detail. Now it’s time to share it with the world.
Publishing in Showit is just the beginning. A strategic launch creates buzz, builds momentum, and helps more of the right people find you.
Here’s how to make it count:
- Email your list with a direct link and a personal note about what’s new and what to explore.
- Update your booking links, social bios, and email signature so everything leads back to your new site.
- Celebrate it. Whether it’s a quiet moment of pride or a public post, this is a big step in your business.
Your website isn’t just a digital brochure. It’s your best salesperson. Launch it with the same energy and confidence you bring to your coaching work.
Your Showit Website Is Closer Than You Think
Want to Customize With Clarity (Not Chaos)?
Whether you’ve already picked a Showit template or you’re still exploring your options, the real key to a smooth customization process is simple: strategy first.
That’s exactly why I created Prebuilt: The Website Jumpstart System; a guided, plug-and-play toolkit that helps you get your brand, content, and layout strategy locked in before you open the Showit editor.
With Prebuilt, you’ll:
- Clarify your ideal client and brand voice
- Map your website goals and CTA strategy
- Write conversion-ready copy with ease
- Organize all your assets so Showit setup feels simple
Ready to ditch the overwhelm and finally launch a site that works?


")

")

